Tag Archives: Professional Map Making

Object direction

For some line and point symbols, object orientation matters. Here comes a small instruction, how the object direction can be edited.
  • Line Symbols
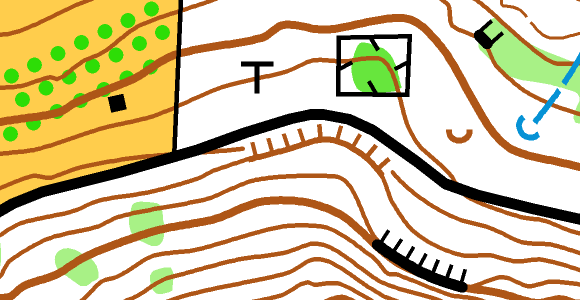
    Most line symbols consist of only one line without additional tags (e.g. contour line or path). Other line symbols such as fences, cliffs, earth banks also have tags within the symbol definition and therefore it is important where the start and end points of these symbols are located.

In the OCAD symbol sets, the tags of the symbols always point to the right when drawing an object.

If the tags point to the wrong direction, you must reverse the object direction (Menu Object > Reverse Object Direction or create a Shortcut), so that the first vertex becomes the last one and vice versa.

  • Point Symbols
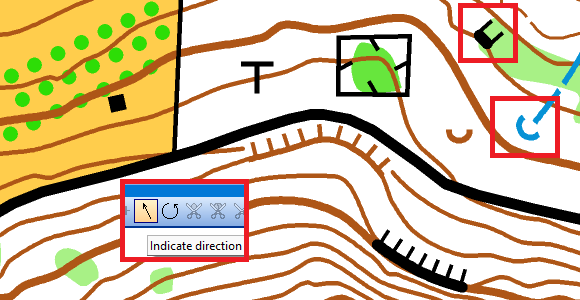
    Most point symbols are oriented to North (e.g. tower, small depression). For others, such as wells, springs or small cliffs, you can specify a particular direction for the object. Click and drag in the direction you want the point object to face. The drawn point object can also be adjusted afterwards using the Indicate direction of area pattern, point or text object function.
  • Area Symbols
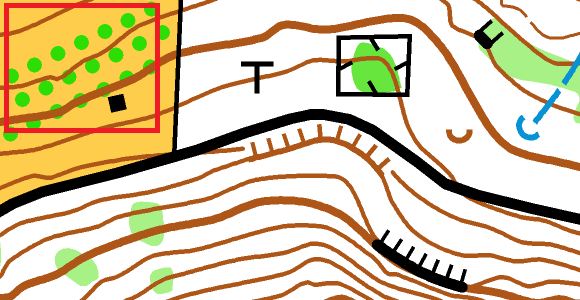
    As with point symbols, the object direction does not matter for most area symbols. Area symbols such as vegetation one direction, orchard, or vineyard can also be aligned using the Indicate direction of area pattern, point or text object function. Click once into the drawing area and the selected object will be oriented to North again.
6 Tips to Minimize Mouse Movements

Your mouse pointer covers considerable distances while drawing. This is because you have to constantly switch between symbols, drawing and editing modes, and functions.

Use the following tricks to give your mouse cursor a breather.

#01: Toggle between drawing and editing tools

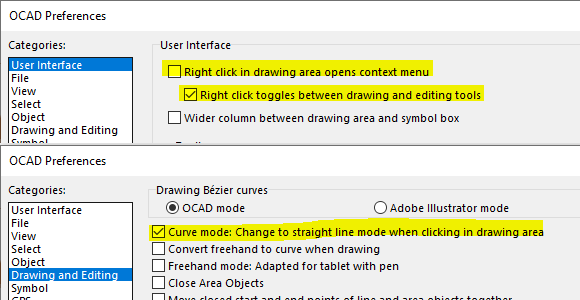
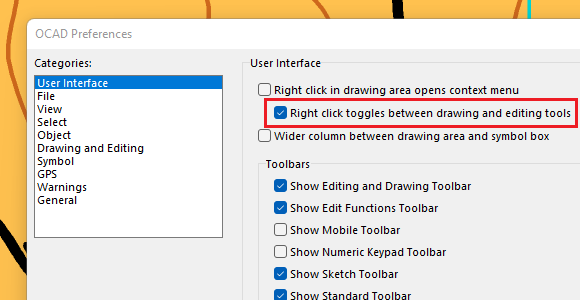
Select the following settings as shown below in the OCAD Preferences. When you draw an object, right-click to close it and get to edit mode. Another right-click switches back to drawing mode.

#02: Select symbol in drawing area

When you select an object in the drawing area, the corresponding symbol is auto-selected by default. This can be faster than selecting the symbol in the symbol box.

#03: Set preferred drawing tool

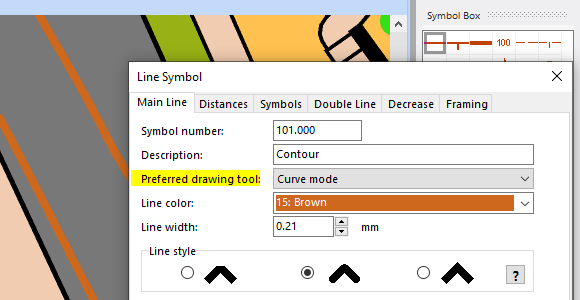
Edit a symbol to choose a preferred drawing tool. When you click on a symbol in the symbol box, the preferred drawing tool of this symbol will now be selected.
The symbols of the supplied OCAD symbol sets have a preferred drawing tool assigned to each of them.

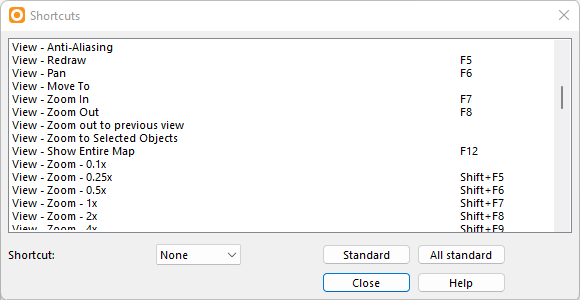
#04 Work with shortcuts

Shortcuts help you to execute functions via key combinations, e.g. fill an object, reverse its direction or change its symbol.

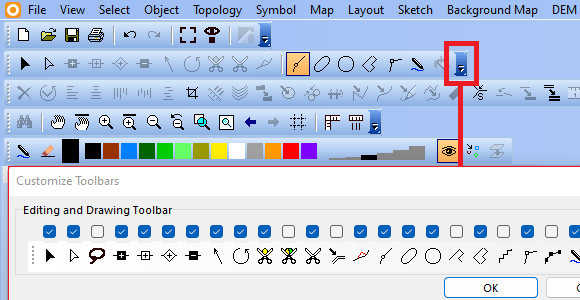
#05 Customize toolbar

The toolbar contains many functions by default. Do you need all of them?
You can also dock the toolbars to the sides or move them to the drawing area.

#06 OCAD Tips and Tricks

Last but not least, if you master the OCAD tips and tricks, you will automatically minimize mouse movements and save a lot of time.

The simplest and most intuitive drawing mode

To draw objects in OCAD, a drawing mode must be selected.

Probably the two most commonly used are the Curve mode (e.g. to draw contour lines) or the Straight line mode (e.g. for buildings).

The simplest way to draw objects in OCAD is to mix these two drawing modes.

First, the following settings must be made.

  1. Activate Right click toggel between drawing and editing tools in the OCAD Preferences > User Interface categorie.
  2. Activate the option Curve mode: Change to straight line mode when clicking in drawing area in the OCAD Preferences -> Drawing and Editing categorie.
Settings in the OCAD Preferences

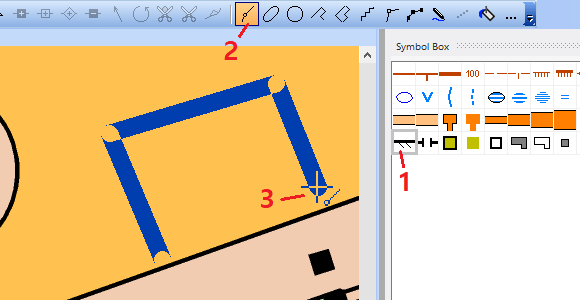
Let’s draw something! It’s as simple as that:

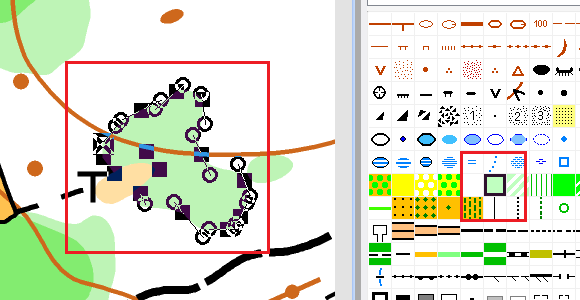
  • Select an area or line symbol (1)
  • Choose the Curve mode (2)
  • Click in the drawing area. (3)
  • Each additional click inserts a new vertex.
  • Right-click to finish the object.
  • Right-click again to draw a new object.
Drawing with Straight line mode

You can also click+drag the cursor to draw a Bézier curve.

As you will notice, this way of drawing is very simple and intuitive.

However, in contrast to the Straight line mode, Normal vertices and no Corner vertices are inserted. This can lead to different representations of line objects.
It is recommended to visually check the line objects and possibly change the vertex types.

Left object: Corner vertices | Right object: Normal vertices

Note: For each symbol, you can define a Preferred Drawing tool. You can change the settings by right-clicking on a symbol in the symbol box.

64bit vs 32bit OCAD version

The latest OCAD update no longer creates a 32-bit version for most users.

What version of OCAD is installed?

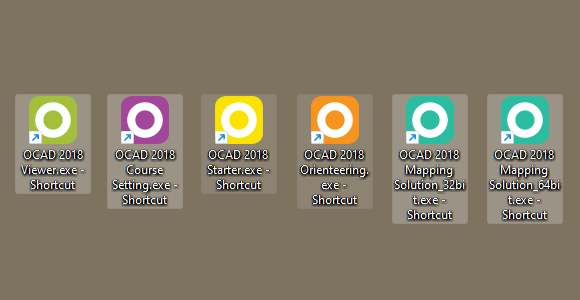
For OCAD Orienteering, OCAD Starter, OCAD Course Setting and OCAD Viewer, OCAD Setup will only install the 64-bit version.

Note: In the past, certain features were only available in the 32-bit version (e.g. real-time GPS). These features now also work in the 64-bit version.

For OCAD Mapping Solution, OCAD Setup still installs both the 64-bit and 32-bit versions.
The reason for this is that some database features are not available in both versions:
– Microsoft Access database files depend on the installed version of the Access Database Engine.
– dbf database file cannot be used in OCAD 64-bit version

What does this mean for you?

You may have to recreate some OCAD shortcuts.
Go to C:\Program Files\OCAD\OCAD 2018 Orienteering. There you will find the ‘OCAD 2018 Orienteering.exe’. Right-click on it and Create Shortcut.

Otherwise you will not notice any effect.

What’s the difference between the 64-bit and 32-bit versions of OCAD?

The 64-bit version of OCAD isn’t faster than the 32-bit version, but it can allocate more RAM. This is important when loading large raster background maps or DEM files.

Other things to note

Almost all computers today run a 64-bit version of Windows. However, if the installed Windows version is 32-bit, OCAD will only install a 32-bit version of OCAD.


Use mouse wheel to zoom in and out instead of scrolling

There is a new option in the OCAD Preferences to use the mouse wheel to zoom in and out instead of scrolling.

Use mouse wheel to zoom in and out instead of scrolling is unchecked (default settings):
Scroll Mouse Wheel = Scroll map vertically
Scroll Mouse Wheel + CTRL = Zoom in and out
Scroll Mouse Wheel + SHIFT = Scroll map horizontally

Use mouse wheel to zoom in and out instead of scrolling is active:
Scroll Mouse Wheel = Zoom in and out
Scroll Mouse Wheel + CTRL = Scroll map vertically
Scroll Mouse Wheel + CTRL +SHIFT = Scroll map horizontally