In the last OCAD Update, small but useful changes were added to the Course Setting Module.
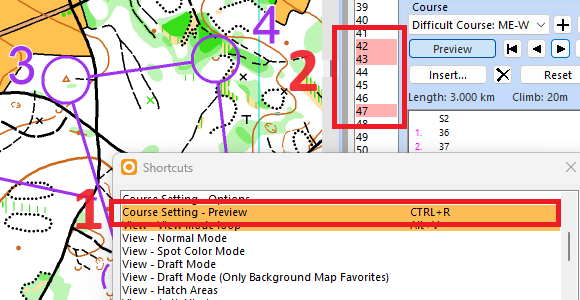
Show Preview
The shortcut CTRL+R has been added to show / hide the Preview mode. (1)
Highlight unused control in course object list
Controls that are not used in any courses will be highlighted with red color in the course object list. (2)
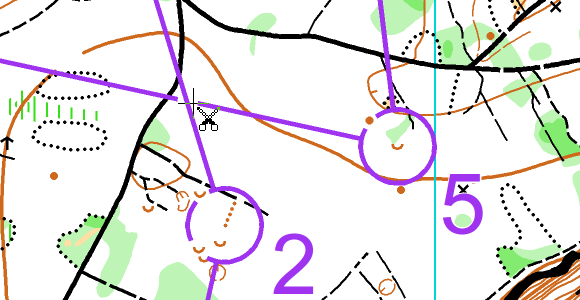
Cut out control circles and connection lines
Select a control circle or course line and use the shortcut CTRL+G to cut a gap.
To create a gap, click once on the control circle or course line. Also, you can click and drag the mouse from the beginning to the the end of the part that should be cut out.
To close a cut, click into the gap again.
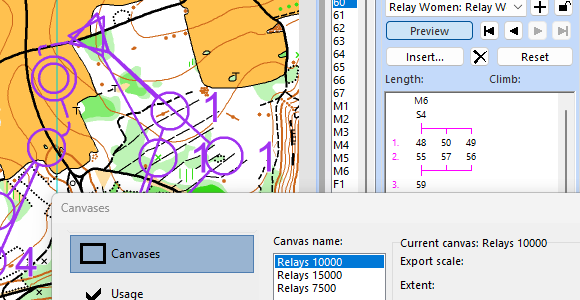
Canvas
Relays are now also supported in the Canvas function.