Vertices are used to define the position of points, lines and areas. In this blog post we will show you how to edit vertices in the most efficient way.
#01: Set mark size large enough
First, make sure that the size of the vertices is large enough. You can change the mark size and mark color in the Drawing and Editing section in the OCAD Preferences. In the same section, you can also scale the size of the mouse cursor.

#02: Move vertices
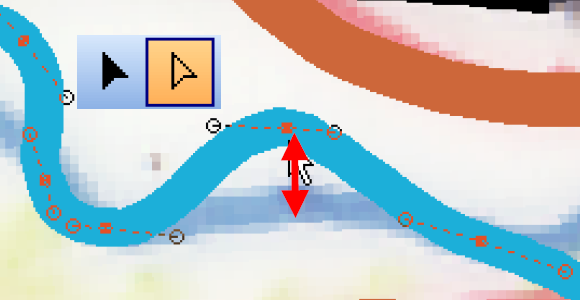
To move a vertex, select the Select Objects and Edit Vertex icon in the Edit and Drawing Toolbar and drag the vertex to the new position. Double click on a vertex and move it then with the arrow keys. Instead of moving a single vertex, you can also click on a segment (section between two vertices) and drag it.
#03: Add and remove vertices
You can use the icons in the toolbar to add or remove vertices (see picture below).
However, you should definitely know these two shortcuts.
- A Vertex can also be added, when you press the Shift and Ctrl key simultaneous while clicking on the object.
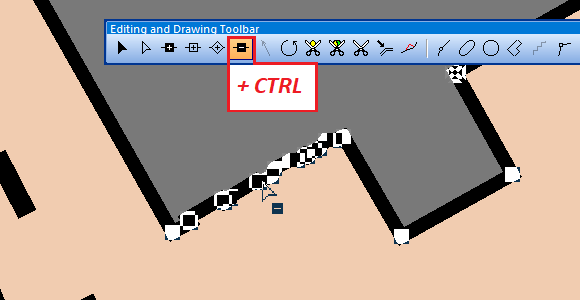
- A Vertex can be removed, when you press the Ctrl key while clicking on an existing vertex.
- Hold down the Ctrl key and the left mouse key while moving over the vertices to remove multiple vertices, e.g. to smooth buildings from imported cadastral data. The mouse movement works like an eraser for the vertices of the selected object.
#04 Toggle between vertices
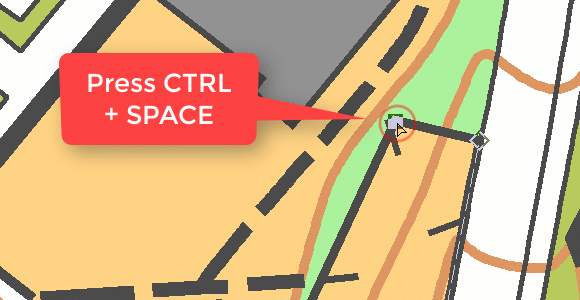
Toggle between the different vertex types (normal vertex – dash vertex – corner vertex) with pressed Ctrl+Space key and click on a vertex.
#05 Edit vertices and tangents of Bézier curves
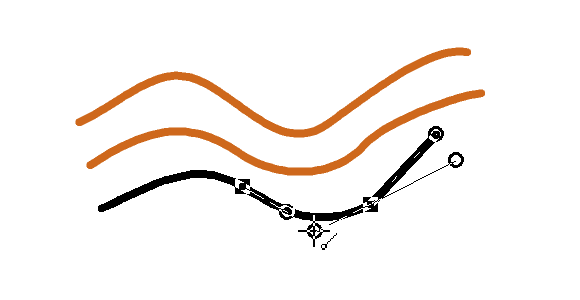
If you draw a Bézier curve and are unhappy with the last vertex drawn, simply click the backspace key. The last tangent will be deleted and you can try again. You can delete as many tangents as you like up to the beginning of the line. The last two tangent end points can also be edited while drawing.
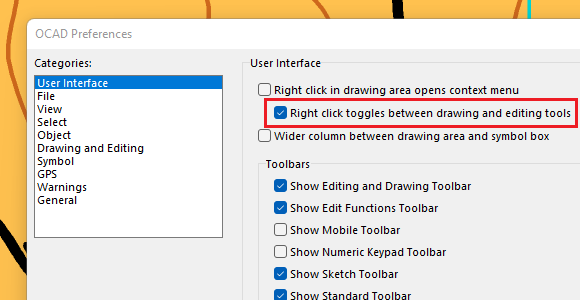
#06: Get faster into the edit mode
Select the following settings as shown below in the OCAD Preferences. When you draw an object, right-click to close it and get to edit mode. Another right-click switches back to drawing mode.
More OCAD Tips and Tricks
Visit the OCAD Wiki page Tips with Keyboard and Mouse to further optimize your drawing and editing skills in OCAD.
