Canvases
Introduction


Choose the Canvases command from the Course Setting menu to export courses and classes of the same course setting project as pdfs in different scales and layouts.
Think of a canvas as a neutral base map on which you can display data. The canvas shows a portion of the map defined by the current extent of the canvas, along with the assigned symbols and background maps.
See also our Example of use at the end of this page.
Canvases
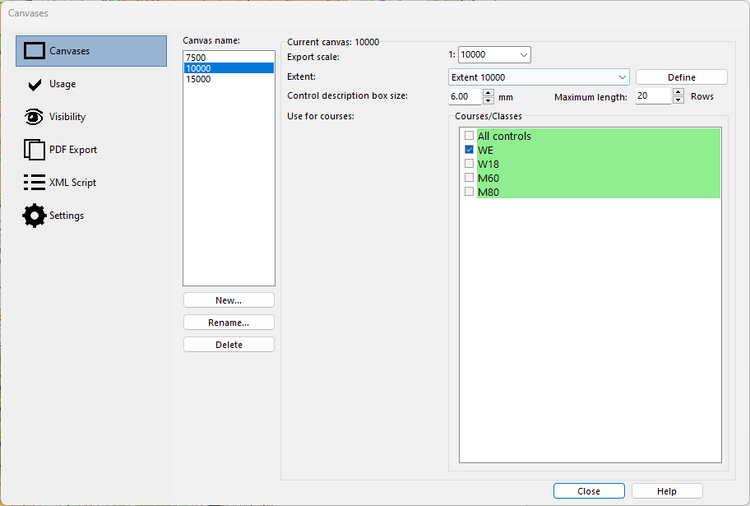
In this section you create canvases, define their extents, and assign courses/classes to each extent.
Canvas name
Press New to add a new canvas, Rename to rename an existing canvas or Delete to delete an existing canvas.
Select a canvas in the canvas name box. The following settings will apply to the chosen canvas.
Export scale
Choose the export scale, in which the chosen extent shall be exported.
Extent
Choose an extent from the list. If there is no extent available, click on Define. Load the background map to define the extent.
The dimensions of width and height are in the map scale and not export scale!
Name: Existing extents will be shown here.
Scale: Set scale to get correct extent when choosing from paper format.
Set from paper format: Choose a paper format, e.g. A4 Portrait.
Set to entire map: The entire map will be set as extent.
Width/ Height: Enter width and height in mm.
Overwrite / Create new extent: If there is no extent defined so far, you need to create a new extent. Enter a name and press Save.
If there are already extents available, you can still create a new extent (enter a different name as the current extent that is shown) or overwrite the currently shown extent (enter the same name as the current extent that is shown).
Control description box size
Enter the box size of the control description in the export scale and its maximum length.
Use for Courses
Select the Courses/Classes that shall be assigned to the chosen canvas in the Canvas name box.
Yellow color: Course/Class not yet used in any canvas
Green color: Course/Class used in one canvas
Red color: Course/Class used in more than one canvas
Usage
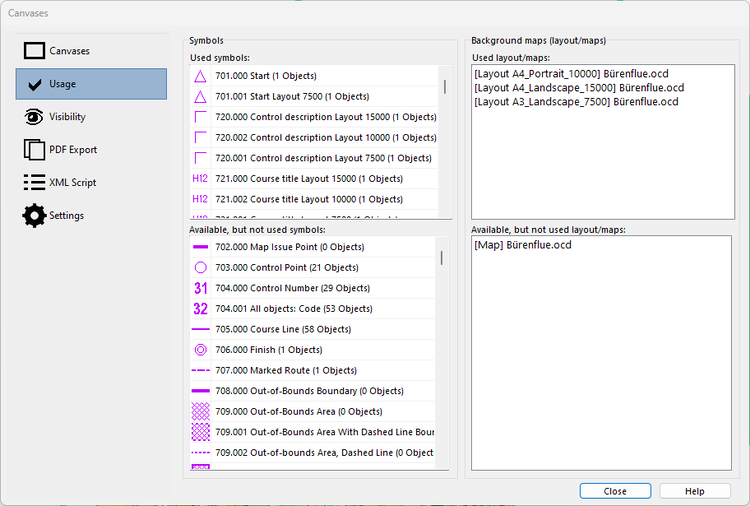
This section is a pre-selection of symbols and background maps, that will later on be used in the Visibility section.
Symbols
Used symbols List with symbols, that can be used afterwards in the Visibility section.
Drag and drop Available, but not used symbols here.
Available, but not used symbols List of all symbols, that the symbol box of your course setting project contains.
Background maps
Used background maps List with symbols, that can be afterwards in the Visibility section.
Drag and drop Available, but not used background maps here.
Available, but not used background maps List of all background maps, which your course setting project contains.
Visibility
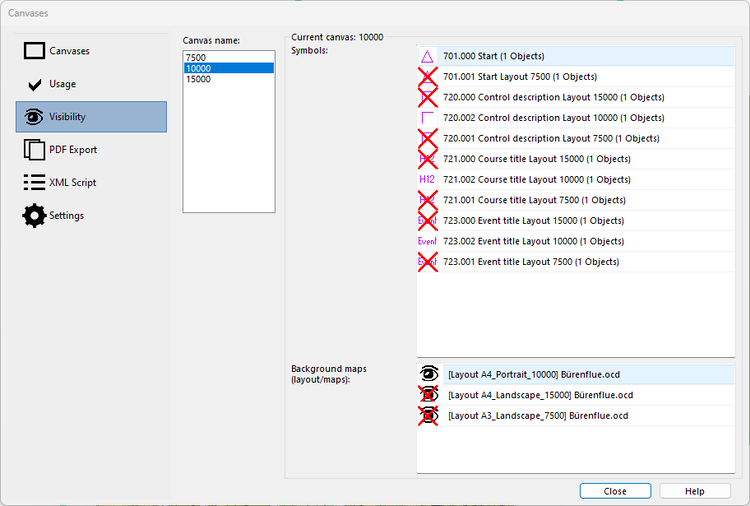
Define which symbols and background maps shall be visible for which canvas.
Canvas name
Select a canvas. If there is no canvas available, define a canvas in the Canvases section.
Symbols
Double click on a symbol to make it visible or not. If you miss a symbol, check the Usage section.
Background maps
Double click on a symbol to make it visible or not. If you miss a background map, check the Usage section.
PDF Export
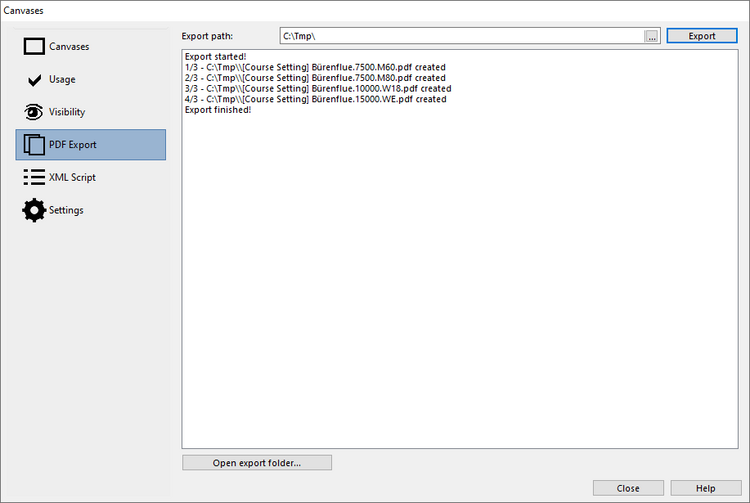
Click Export to export all courses/classes to the specified export folder.
![]() If the map contains raster layout objects then OCAD takes the dpi resolution from the export setings.
If the map contains raster layout objects then OCAD takes the dpi resolution from the export setings.
XML Script
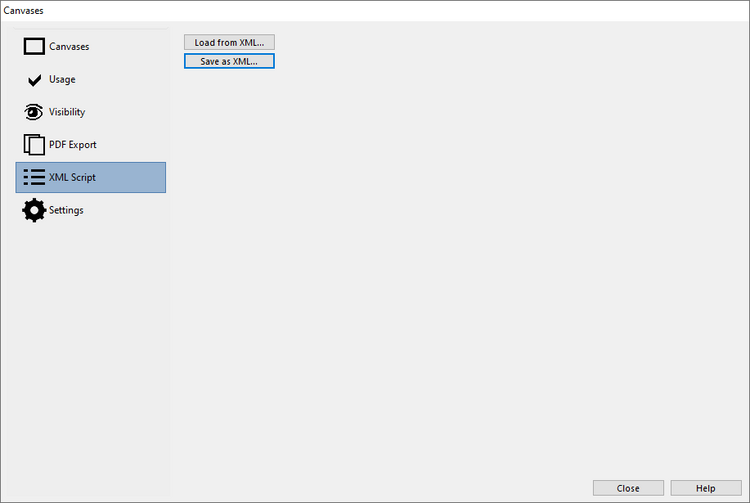
Load from XML: Load settings from an XML file.
Save as XML: Save current settings as an XML file.
Settings
Activate canvases in course preview and export: If activated, the preview of your courses will load the corresponding canvas.
Export: Choose if you like to export courses or classes.
Example of use
![]() You can download the data for this example here.
You can download the data for this example here.
Initial Situation
Given the following example:
For a long distance orienteering race, the following courses and classes are offered.
- Long Course, Class WE, Scale 15’000
- Medium Course, Class W18, Scale 10’000
- Medium Course, Class M60, Scale 7’500
- Short Course, Class M80, Scale 7’500
As we have three different scales, we need three different layouts.
Thanks to the Canvases function, all courses and/or classes can be automatically exported as PDF from a single course setting project in the specified scale and layout. Especially for larger events, this reduces the time required and potential sources of error.
However, the preparations and settings require a sound knowledge of OCAD.
Organisation
We save all the below mentioned files in the same foler. This makes it easier, if data is shared with other people, e.g. via Dropbox or OneDrive.
Preparation
For our example we work with the following files.
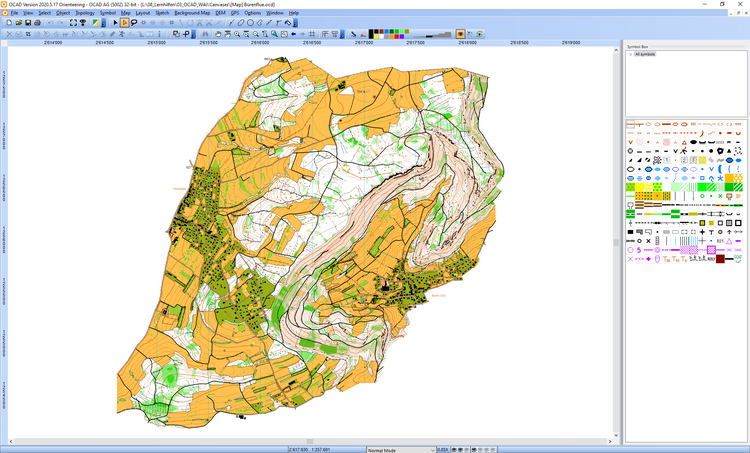
- [Map] Bürenflue.ocd
The map file.
Scale 1:10'000
The map file is what you call orienteering map. You get it from the map maker or from the mapping responsible person of your club. Make sure that the map file do not contain any layout object. So, it should not contain any logos, texts, ...
If any map corrections need to be done, you must make them in this file only.
- [Layout_A3_Landscape_7500] Bürenflue.ocd
- [Layout_A4_Landscape_15000] Bürenflue.ocd
- [Layout_Portrait_10000] Bürenflue.ocd
The three different layout files.
Scale 1:10'000 for all three files!
In each layout file, we loaded the [Map] Bürenflue.ocd as background map.
In each layout file, we created a layout according to its export scale and page orientation. So, you can add logos, draw a frame, indicate the scale, ...
Note: The layout files do not contain any course setting objects!
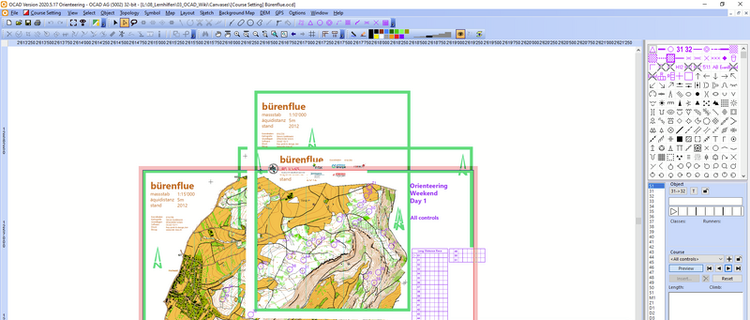
- [Course Setting] Bürenflue.ocd
The course setting files has loaded all three layout files (and not the map file!) as background map. But since the layout files in turn have the map file ([Map] Bürenflue.ocd) loaded as a background, this also appears.
Scale is also 1:10'000.
Canvases settings
We defined the canvases 7500, 10000 and 15000.
We defined the Extent 7500, Extent 10000 and Extent 15000. The export scales and extents fits to the layout files.
We assigned each class to a canvas:
- Class WE used for Canvas 15000
- Class W18 used for Canvas 10000
- Class M60 used for Canvas 7500
- Class M80 used for Canvas 7500
See also the Canvases settings in the screenshot above.
Usage settings
We duplicated some symbols in the symbol box of the course setting project to put them at a different place for each canvas.
E.g. symbol for control description, symbol for course title or symbol for event title. It's good practice to give the duplicated symbols a new and meaningful name. Then it's easier in the Usage settings to assign the symbols to the corresponding canvases.
See also the Usage settings in the screenshot above.
Visibility settings
We set the Visibility settings as in the screenshot above.
PDF Export
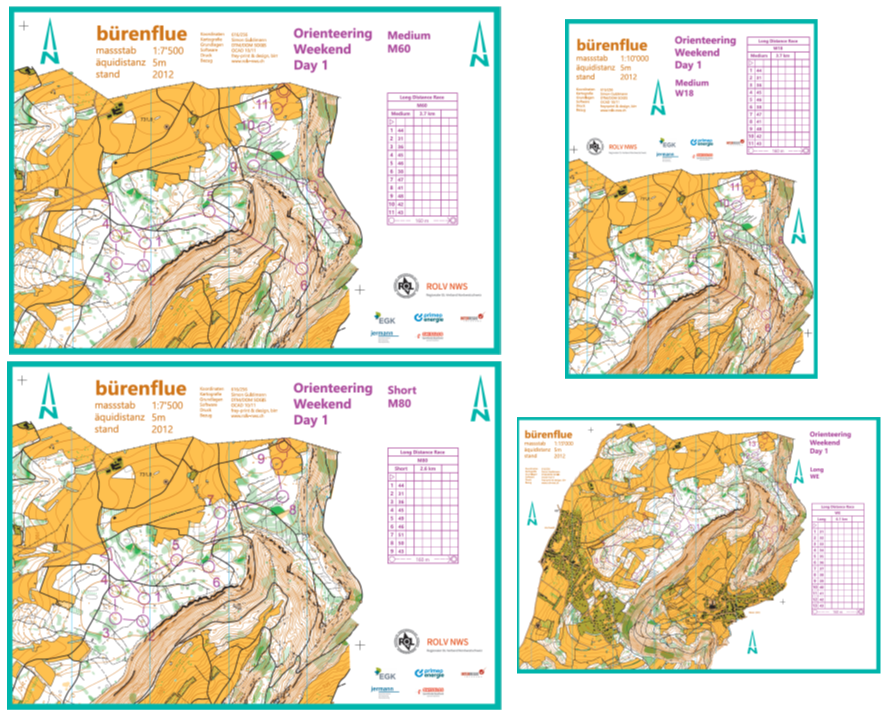
We get the following output files:
Class WE, Long Course, Scale 15’000, A4 Landscape
Class W18, Medium Course, Scale 10’000m A4 Portrait
Class M60, Medium Course, Scale 7’500, A3 Landscape
Class M80, Short Course, Scale 7’500, A3 Landscape
Conclusion
It needs some effort to prepare the layout files and set up the canvases for a course setting project. For sure, this is something that should/can be done many weeks before a competition and should be tested properly beforehand.
Once the canvases are set, the function is very useful. If there are last-minute changes to courses and maps (as it often happens), these changes only have to be done in the map file or in the course setting file. This reduces potential errors.
