Objekte ausstanzen: Unterschied zwischen den Versionen
Zur Navigation springen
Zur Suche springen
FBO (Diskussion | Beiträge) Keine Bearbeitungszusammenfassung |
FBO (Diskussion | Beiträge) Keine Bearbeitungszusammenfassung |
||
| Zeile 8: | Zeile 8: | ||
:* '''Use crop rectangle''': All desired objects outside of a rectangle are cropped. Move and adjust the rectangle to the desired position and size. | :* '''Use crop rectangle''': All desired objects outside of a rectangle are cropped. Move and adjust the rectangle to the desired position and size. | ||
:* '''Chosen line or area object''' All desired objects outside of a line or area object are cropped. Click the '''Choose selected crop object''' button to choose the crop object. | :* '''Chosen line or area object''' All desired objects outside of a line or area object are cropped. Click the '''Choose selected crop object''' button to choose the crop object. | ||
Check the option ''Cut a hole'' to cut a hole instead of cropping, i.e. all desired objects inside a range are cropped. | Check the option '''Cut a hole''' to cut a hole instead of cropping, i.e. all desired objects inside a range are cropped. | ||
==Examples== | |||
Version vom 23. Mai 2012, 10:57 Uhr
Choose the Crop Objects command in the Object menu to crop objects. The Crop Objects dialog appears. In the first field, choose between 3 different Objects to crop modes:
- All objects: All objects in a certain area are cropped.
- All objects from selected symbols: All objects from selected symbols in the symbol box which are in a certain area are cropped.
- Only chosen objects: All selected objects in the drawing area will be cropped. Click the Add selected objects button to choose the objects.
Choose between 2 different Line or area crop objects modes in the second field:
- Use crop rectangle: All desired objects outside of a rectangle are cropped. Move and adjust the rectangle to the desired position and size.
- Chosen line or area object All desired objects outside of a line or area object are cropped. Click the Choose selected crop object button to choose the crop object.
Check the option Cut a hole to cut a hole instead of cropping, i.e. all desired objects inside a range are cropped.
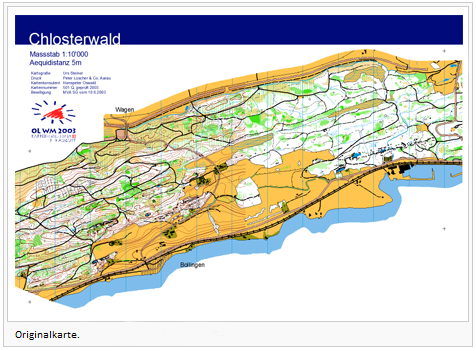
Examples
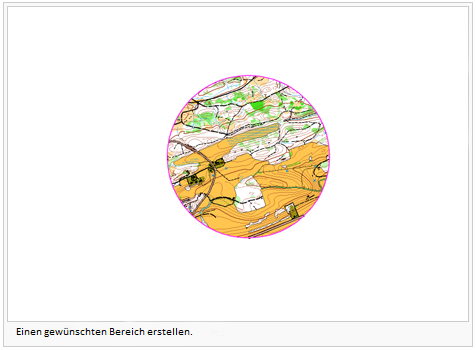
Create a desired sector
- Choose Crop Objects from the Object menu.
- Choose All Objects at Objects to crop.
- Draw an object which narrows the desired area or select an existing object.
- Choose Chosen line or area object and click Choose selected crop object.
- Instead of using points 3 and 4 it is also possible to use the Use crop rectangle option.
- Click Crop and OCAD creates the area you selected.
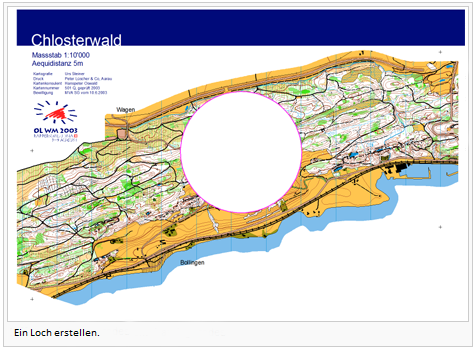
Create a hole
- Choose Crop Objects from the Object menu.
- Choose All Objects at Objects to crop.
- Draw an object which narrows the desired area or select an existing object.
- Choose Chosen line or area object and click the Choose selected crop object button.
- Instead of using points 3 and 4 it is also possible to use the Use crop rectangle option.
- Check Cut a hole.
- Click Crop and OCAD creates a hole where you have drawn and selected the area.
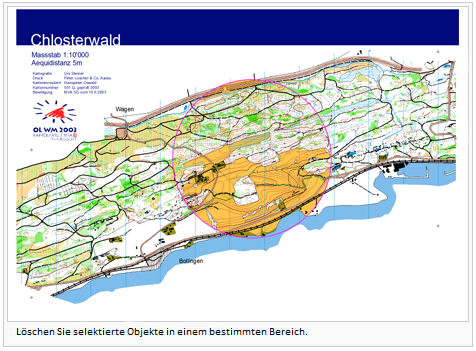
Delete selected objects in a certain area
- Choose Crop Objects from the Object menu.
- Select All objects from selected symbols and mark the symbols in the symbol box which have to be cropped.
- Draw an object which narrows the desired area or select an existing object.
- Choose Chosen line or area object and click the Choose selected crop object button.
- Instead of using point 3 and 4 it is also possible to use the Use crop rectangle option.
- Click Crop and OCAD delete all selected symbols which you selected in the symbol box except the chosen area.


