Laser-Distanzmessgerät
Mit Laser Distanzmessgerät verbinden
Die Verbindung zum Laser Distanzmessgerät wird via serielle COM-Schnittstelle aufgebaut. Verwenden Sie Bluetooth für den Datentransfer zwischen dem Messgerät und dem Computer.
- Schalten Sie das Laser Distanzmessgerät ein
- Stellen Sie sicher, dass die Bluetooth-Verbindung zwischen dem Laser Distanzmessgerät und dem Computer aufgebaut ist
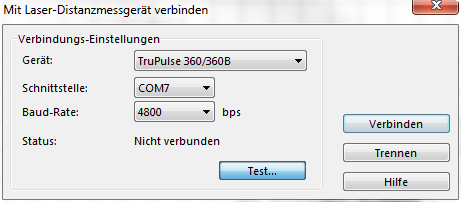
- Wählen Sie Mit Laser Distanzmessgerät verbinden aus dem Menü GPS.
- Passen Sie die Einstellungen für Gerät, Schnittstelle und Baud-Rate an.
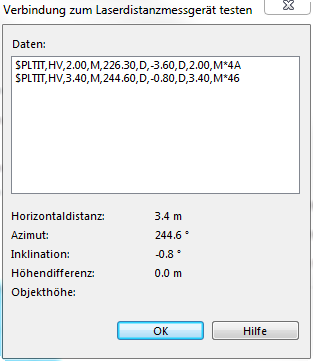
- Klicken Sie auf die Schaltfläche Test um die Verbindung zu testen. Die Messwerte werden hier angezeigt, wenn die Verbindungs-Einstellungen korrekt sind.
- Klicken Sie auf die Schaltfläche Verbinden um die Verbindung herzustellen
Laser Distanzmessgerät Zeichnungswerkzeug
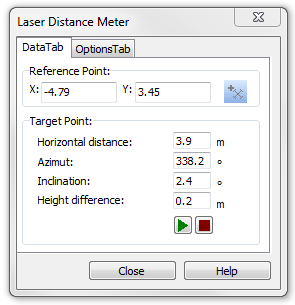
Wählen Sie das Laser Distanzmessgerät Zeichnungswerkzeug. Der Dialog Laser Distanzmessgerät wird angezeigt.
Drawing options
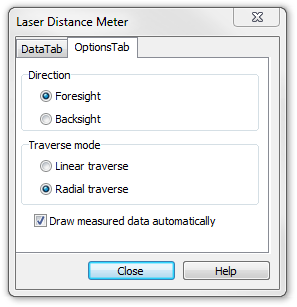
Settings for different working processes can be done in the Options tab.
Direction: Choose between foresight and backsight.
- Foresight: Measure forwards from your known position to a place with unknown position.
- Backsight: Measure backwards from a place with known position to your unknown position.
Traverse mode: Choose between linear traverse and radial traverse
- Linear traverse: Measure a series of points. A measured point is the start position for the next measurement.
- Radial traverse: Measure a series of points. The start position is always the same.
Draw measures data automatically: Turn on this option if measured positions should be added to the map automatically. Otherwise each position must be confirmed by the user.
Add real world angle to azimut: Turn off this option if declination is already corrected by the laser range finder.
Drawing
- Set a reference point: Set it by clicking on the map or get the GPS position.
- Measure the features position. Depending on the Draw measures data automatically option the positions are added to the map automatically or they must be confirmed.
- Finish a feature by clicking the Stop button.
Back to GPS
Back to Drawing an Object
Back to Main Page


