Glyphen einfügen: Unterschied zwischen den Versionen
Zur Navigation springen
Zur Suche springen
Admin (Diskussion | Beiträge) Keine Bearbeitungszusammenfassung |
Admin (Diskussion | Beiträge) Keine Bearbeitungszusammenfassung |
||
| Zeile 1: | Zeile 1: | ||
# To insert glyphs change '''Font''' in '''[[http://www.ocad.com/en.wiki/index.php?title=Create_a_New_Symbol#Create_a_New_Text_Symbol Text Symbol]]''' dialog box into a font which supports required glyphs. | # To insert glyphs change '''Font''' in '''[[http://www.ocad.com/en.wiki/index.php?title=Create_a_New_Symbol#Create_a_New_Text_Symbol Text Symbol]]''' dialog box into a font which supports required glyphs. | ||
# Click in drawing area | # Click in drawing area and set the cursor. | ||
# Choose '''Insert Glyphs''' from '''Object''' menu. | # Choose '''Insert Glyphs''' from '''Object''' menu. | ||
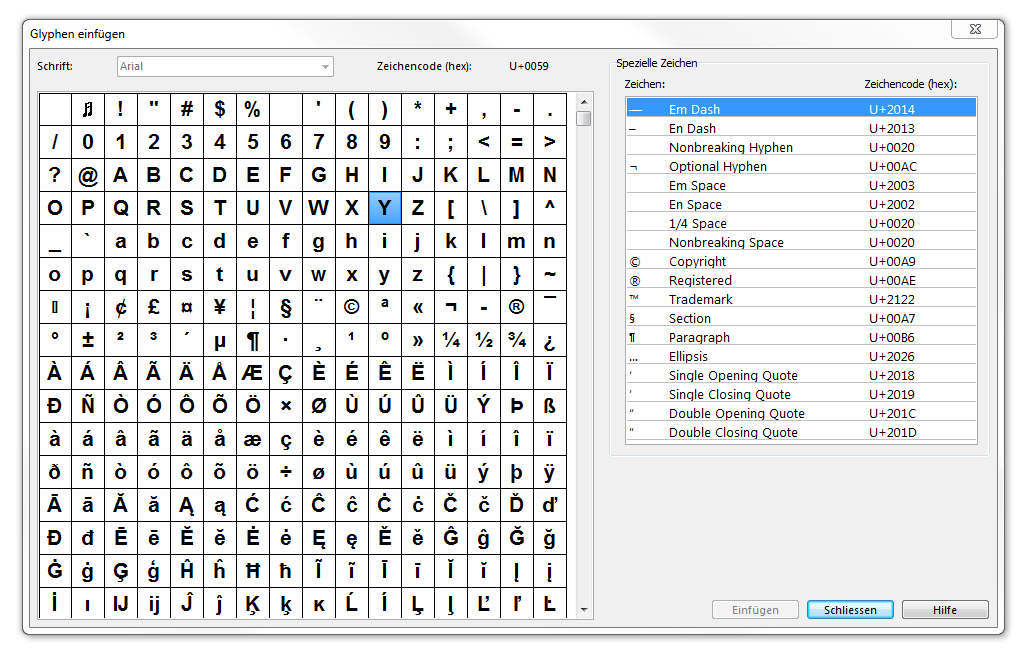
# The '''Insert Glyps''' dialog box appears | # The '''Insert Glyps''' dialog box appears: | ||
: [[File:Hint.jpg]] Only characters that are included in the character set can be added. | [[File:InsertGlyphs.PNG]] | ||
# Double click on character to add it or | |||
: select choosen character and click '''Insert'''. | |||
: [[File:Hint.jpg]] -Only characters that are included in the character set can be added. | |||
:: -Add special characters on the right side. | |||
Version vom 26. Oktober 2011, 08:35 Uhr
- To insert glyphs change Font in [Text Symbol] dialog box into a font which supports required glyphs.
- Click in drawing area and set the cursor.
- Choose Insert Glyphs from Object menu.
- The Insert Glyps dialog box appears:
- Double click on character to add it or
- select choosen character and click Insert.
