Ansicht: Unterschied zwischen den Versionen
FBO (Diskussion | Beiträge) |
FBO (Diskussion | Beiträge) |
||
| Zeile 33: | Zeile 33: | ||
* Drag a rectangle with the mouse pointer around a desired area to see this area magnified. | * Drag a rectangle with the mouse pointer around a desired area to see this area magnified. | ||
* Click on the drawing area to get the double magnification of the current map view at the point you clicked. | * Click on the drawing area to get the double magnification of the current map view at the point you clicked. | ||
After zooming in once, the cursor changes to the previous mode (e.g. Select Object and Edit Vertex mode) | |||
==Zoom In Locked== | ==Zoom In Locked== | ||
Version vom 22. Mai 2012, 08:44 Uhr
Redraw
Choose this command to redraw the map on the screen. This is especially useful when the displayed map is out of date due to editing operations (like deleting area objects).
By default, the map is redrawn automatically after editing it. If you want to disable the automatic redrawing, check the Redraw background automatically option in the View category of OCAD Preferences.
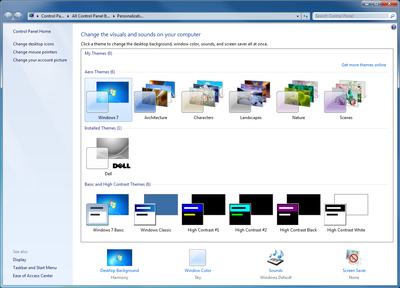
![]() For Windows Vista and 7 users: We recommend to use an Windows Aero Theme. You can change the theme in Control Panel\All Control Panel Items\Personalization. The Themes Windows Basic and Windows Classic lead to many unnecessary screen redrawings in OCAD.
For Windows Vista and 7 users: We recommend to use an Windows Aero Theme. You can change the theme in Control Panel\All Control Panel Items\Personalization. The Themes Windows Basic and Windows Classic lead to many unnecessary screen redrawings in OCAD.
Pan
Choose Pan in the View menu, press the F6 key (default Shortcut) or click the Pan icon in the View Toolbar to activate the Pan tool.
With this tool you can move to another part of the map. Drag the map to the desired location. After you dragged once the cursor changes to the previous mode (e.g. Select Object and Edit Vertex mode). If you want to use the Pan mode several times, use the
Pan locked tool.
![]() You can also hold the Space key to change to Pan mode.
You can also hold the Space key to change to Pan mode.
Pan Locked
Click the Pan Locked icon in the View Toolbar to activate the Pan Locked tool.
With this tool you can use the Pan mode several times. Press the Esc key or another toolbar button to exit the Pan mode.
![]() You can also hold the Space key to change to Pan mode.
You can also hold the Space key to change to Pan mode.
Move To
Choose this command in the View menu to move the view to a desired position. The Move View To dialog appears. Enter the Horizontal and Vertical position in real world coordinates and click the OK button. To set up the real world coordinates choose Scale and Coordinate System from the Map menu.
Find Selected Objects
If you have objects on the map selected, choose this command in the View menu or click the Find Selected Objects icon in the Edit Functions Toolbar to move the view to those selected objects. The selected objects are displayed in the middle of the drawing area.
Zoom In
Choose the Zoom In command in the View menu, click the Zoom In button in the View toolbar or press the F7 key (default Shortcut) to display the map with a higher magnification. There are two options to zoom into the map:
- Drag a rectangle with the mouse pointer around a desired area to see this area magnified.
- Click on the drawing area to get the double magnification of the current map view at the point you clicked.
After zooming in once, the cursor changes to the previous mode (e.g. Select Object and Edit Vertex mode)
Zoom In Locked
Click this button to use the Zoom In mode several times. Press the Esc key or another toolbar button to exit Zoom In mode.
Zoom Out
Choose this command to see a larger area of the map.
If you do a Zoom in and afterwards a Zoom out the view will go back to the view before the Zoom In.
Zoom Out to Previous View
Zoom Out to Previous View button
ToDo
Zoom to Selected Objects
If you have some objects selected, choose this command to zoom the view to them.
Show Entire Map
Choose this command to see the entire map on the screen. The scroll bars will be adjusted to the entire map.
Zoom to Previous View
ToDo
Zoom to Next View
ToDo
Zoom
Choose between different zoom levels:
- 0.1x
- 0.25x
- 0.5x
- 1x
- 2x
- 4x
- 8x
- 16x
- 32x
User Defined
Set the User Defined zoom in OCAD Preferences from Options menu - Category: View -> User defined zoom.
Bookmarks
Create or Manage bookmarks from View menu - Bookmark.
The number of bookmarks is limited by 64.
