TPI stands for Topographic Position Index, which is defined as the difference between a central pixel and the mean of its surrounding cells. Choosing this option, OCAD first creates a smoothed DEM using TPI and calculates contours afterwards.
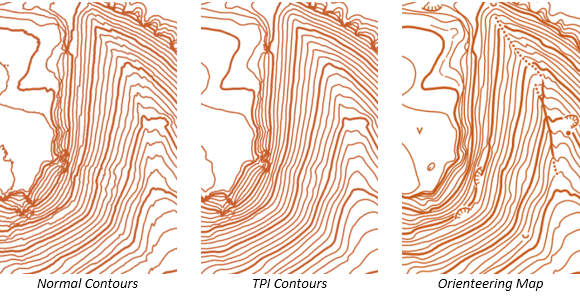
Some details may get lost, but results are very satisfying in constant slopes. Use these contours, if you want to adopt the calculated contour lines directly to your map.
In the DEM Wizard you can create “normal” custom contours (no smoothing) and/ or smoothed contours using TPI in one single step:
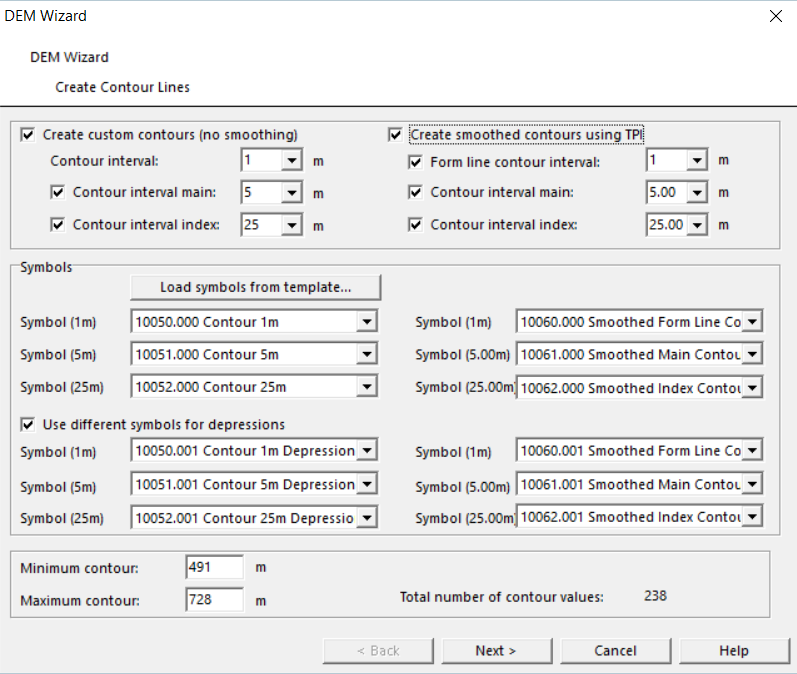
- Choose the desired amount of contour and the interval.
- Assign a line symbol for each type appears. By default, the first three line symbols in the settings are pre-selected.
- Click on “Load symbols from template…” to get 12 line symbols at the bottom of your symbol box, which can be used for the settings.
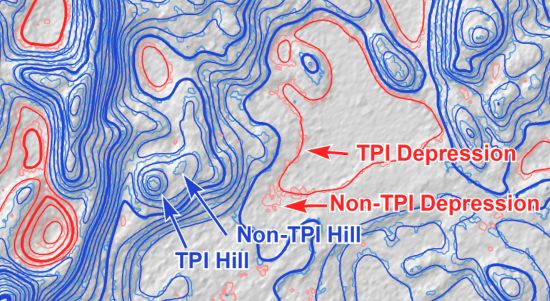
- Use different symbols for depression to distinguish depressions from hills.
As mentioned in the beginning, TPI contours were derived from a smoothed DEM, means some details will get lost. The following recommendations can be made:
- For mapping in the terrain, use the custom contour lines as background, where you have all details on it.
- To draw contour lines on the PC, first calculate and load the TPI contours and adapt them afterwards where needed. Use the Reshape function for that.
Especially in steep and constant slops, the biggest part of the TPI contours can be adopted to your map without redrawing. You gain much time like that.
For further information, please visit our Wiki.